A Beginners Guide to Needlepoint

Whether you are looking to start a new needlepoint project for the first time, or want a refresher on the needlepoint basics, this article will take you through an in-depth overview of everything you need to get started needlepointing.
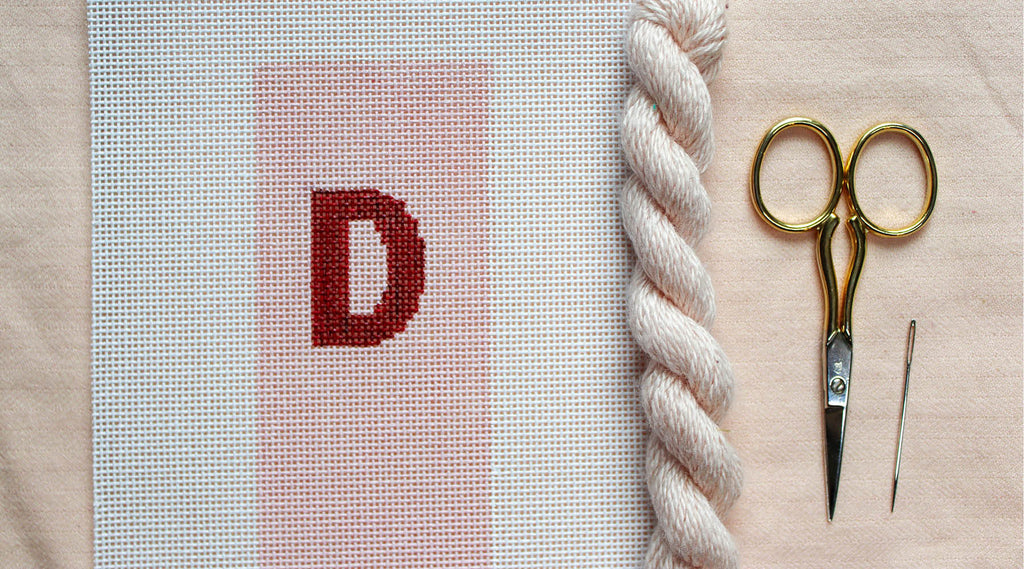
Materials: Canvas, Needle, Thread, and Scissors
Canvas:
Canvas comes in a few different mesh sizes. Mesh size refers to the number of holes per inch that exist on the canvas. Here you can see a ruler measuring 1 inch on a canvas. You will notice that there are 13 holes within 1 inch. Which is how we know it is 13 mesh canvas.

The two most popular sizes are 13 and 18 mesh. 13 mesh canvases have bigger holes than 18 mesh and are often easier to stitch for beginners.
Needles:
Needlepointing uses what is referred to as a tapestry needle. It has a slightly duller tip, and a much wider loop than a sewing needle. For a 13 mesh canvas you will need a size 20 needle. For an 18 mesh canvas you will need a size 22 needle.

Threads:
Threads can vary in thickness, so you want to be sure that you are picking a thread that is appropriate for your canvas. My favorite thread is Silk & Ivory, which is a 50/50 blend of merino wool and silk. Other brands you could use include Pepper Pot or DMC Cotton (a more economical option).
Scissors:
Finally, you will need embroidery scissors to cut your thread. These are unique in that they have a much smaller and finer tip than regular paper scissors. This allows you to get close to the back of the canvas when snipping without accidentally cutting another thread.
Cutting Your Thread
The biggest tip to remember when cutting your thread is to save the tag. These tags tell you the color and lot number. If you were to run out of thread while stitching your canvas, you will need this information to get more. You want to start by making a cut where the thread is tied together. From there stretch out the thread and cut. Then make a similar cut at the bottom. You want each piece of thread to be about the distance from your wrist to your elbow. Any longer your thread will often get tangled and it is harder to stitch with.

Threading Your Needle
Threading a needle is something that many people find difficult. But with the proper tips and tricks it can become seamless. The easiest way to thread your needle is to hold the needle in your right hand and with your other hand loop the thread over the point of the needle and pull it tight against the needle to make a firm fold in the thread. Pinch the thread and pull the needle out. Place the eye of the needle over the fold and push it down.

Starting A Thread
Now that your needle is threaded it is time to start our first stitch. Take a moment and tie a small knot at the end of your thread. Since we will be using basic needlepoint tent stitches we will want to start stitching in the top right hand corner of your canvas design. Push the needle through the top of the canvas about an inch from where we are going to start stitching. So if we are starting in the top right corner I usually place my needle an inch to the left. This creates an "anchor" for your thread.
Tent Stitch
The most frequently used stitch in needlepoint is the “tent” stitch and it comes in three main variations: Basketweave, Continental, and Half-Cross Stitch. If you were to never learn any other stitches you could use these to stitch any canvas.
Basketweave: Stitched in diagonal rows, creating a woven appearance on the back of the canvas.
- Durability: High Durability
- Distortion: Very Low
- Amount of Thread: High
- Recommended Use: Perfect for backgrounds or when stitching large areas.


Continental: Stitched horizontally, resulting in long stitches on the back of the canvas. An overall great stitch for just about any situation. You could only learn this stitch and still have the ability to needlepoint any project.
- Durability: Medium Durability
- Distortion: Medium
- Amount of Thread: Medium
- Recommended Use: Best used for small or tight areas.


Half-Cross: Stitched horizontally, resulting in long
- Durability: Low Durability
- Distortion: Low
- Amount of Thread: Low
- Recommended Use: Uses the least amount of thread so it is perfect when you are trying to make the thread you have last. Not used as frequently as the other stitches.
Finishing a Thread
Once you have about 2 inches of thread left on your needle you will need to finish that thread and start a new one. To finish a thread, simply run it under several stitches of the same color on the back of your canvas. Once completed snip off the end with your embroidery scissors.

Starting a New Thread
Now that you have a firm starting place on your canvas you can easily start a new thread by running your needle under several stitches of the same color on the back of your canvas and pulling the thread up to your next starting place. You will want to start your next thread where your last stitch ended. Continue these steps until you have completed your canvas!


Leave a comment